Follow Me on Pinterest

Tuesday, May 28, 2013

Ticket to Paradise


Hi Stampers! Today I'm sharing a card I'll be making in June with my Stamp-A-Stack class at Life's Memories and More and I'm calling it Ticket to Paradise. This would make a great gift by adding a few tickets to somewhere special. Aren't these little tickets in the corner the cutest?


I used a 6x6 stack of paper from Authentique called "Summer". On the back side of the cover were all these great little tags that I cut apart. I added a little extra using my Ticket Punch from Stampin' Up! As a bonus this month, we are making this card to fit into these little paper bags that I also got from Life's Memories and More, to slide your card into:


I hope you like my project today. Thanks for stopping by!

Monday, May 27, 2013

Chi Chi Memories Meets Sweet Sunday!

Hi Stampers, I have a little bit of Summer to share with you today!


Isn't this the cutest sandcastle ever? I grabbed this free Puppet Castle digi over at Chi Chi Memories It was made as an accessory to the Puppet Show Stamp Set but when I saw it, I thought it had Sandcastle written all over it!


I used a combination of techniques to color in the image. I started with a combination of my blender pen and Stampin' Up Markers, coloring the castle in Barely Banana and Summer Starfruit. Along the way I added some More Mustard, Soft Suede, and Crumbcake to add depth to the windows and the base of the image. The background was done with my blender pen picking up ink from my Daffodil Delight and Bashful Blue ink pads. I also used my blender pen to color the little flags Red and Blue in honor of Memorial Day. The "You Are My Sunshine" banner across the top is from Jolee's and came from my Project Life bin. It just seemed perfect for this spot on my card!

The Sketch comes from Karen Giron's Sweet Sunday Sketch challenge 185


I also didn't want to leave then inside plain so I jazzed it up using some DSP out of my scrap basket.


Thanks for stopping by today ~ have a fabulous week! I know I will!


Sunday, May 19, 2013

Eat a Cupcake!


Today I used a technique called stamping off. It's a great technique to get a variety of color shades from one ink pad. Simply ink the stamp once then stamp it three times onto a piece of scrap paper to get the variation on the image as shown here.


I stamped "Keep Calm" on the front in Primrose Petals Classic Ink. A piece of Stampin' Up! DSP from the Print Poetry DSP Pack, a bit of Primrose Petals punched with the Dotted Scallop Ribbon Border finish off the front.


As you can see, I used the "Eat a Cupcake" stamp for the inside, and added one more teeny cupcake that I finished off with a Basic Jewel. I don't always embellish the inside of my cards, but lately I have been adding that extra touch.

Thanks for stopping by today!

Friday, May 17, 2013

Miss You


I will definitely miss this stamp set - I couldn't wait to get it when I first saw it in the catalog, and I've really used it often over the past two years. I think it looks great in these bright colors don't you?

Thanks for stopping by, and have a great weekend!

Wednesday, May 15, 2013

Giftable Notebooks


Last weekend I added this project to my post for the Stampin' Addicts Blog Hop. I also shared it with my Stamp A Stack card class that met last weekend. One of the ladies asked me for the measurements again, so I thought I would add them here also.

For the image above, I cut my Crumb Cake Cardstock to 5 1/2 x 6 3/4 and it was scored at 3 1/4" and 3 1/2" to open like a book.

I also made another note pad cover recently using Up, Up and Away - another one of my all time favorite stamp sets that will soon be retiring.


This note pad opens from the bottom to the top. The measurements for it are 3" x 10 1/2", and it's scored at 5 1/8" and 5 3/8". I ran it through my Big Shot using the Oval Designer Frames Folder, then punched out the center with the Extra Large Oval Punch.

I tend to use this stamp set with bright colors, but wanted to try it using shades of gray and black. Here I used Basic Gray, and off stamped it to get a lighter shade, then stamped the details in Basic Black. I added a touch of Newsprint DSP and a few Basic Jewels to finish it off.

Hope you like it ~ Thanks for stopping by!

Tuesday, May 14, 2013

Stationary Box Tutorial


Remember this little box from last weekend's blog hop? I promised to post the directions. I tried to link it right to the tutorial that Valerie Stangle had posted on her blog Stampin' Gal Val but it seems as though she has removed the link from her blog. So here is my version of her directions - though I must admit her original directions were much nicer!

Place an 8 ½ x 11” piece of card stock in the corner of your Simply Scored so it’s aligned vertically with the 8 ½” going across the top. Score at 1”, 2”, 6 ½”and 7 ½”.
Turn it 90* and score again at 1”, 2”, 7 ¾” and 8 ¾”.
Pre-fold on the score lines.


Cut away the 3 outermost squares at the bottom of the box. Snip the bottom tabs as shown and add a bit of Sticky Strip. I like to use my 1 3/8” Circle punch, centered on the first score line at the bottom side, to make it easier to reach in and pull out a note sheet.


At the top of the scored box, cut away the outermost square and the rectangle just above it as shown. Make a tab out of the remaining 1x1 square. Add sticky strip to the top tabs and assemble the box.


I like to take a little wedge out of the tabs to help it fit together better.

Monday, May 13, 2013

A Bit of This and A Bit of That


Today's post is going to be a quick one as I share one last card using my Fabulous Florets Stamp Set. I CASED this one from a card I found in Stampin' Succeess - a magazine that Stampin' Up! sends demonstrators. It's full of fun ideas, cards and scrapbook sketches. On this sample, I used a doily that was embossed using Silver Embossing Powder and my Versa Mark Ink Pad. I cut a piece of this off and layered a couple of punches - combination of Calypso Coral ink and paper here, and tucked a couple teeny banners made from my scrap bin so they peeked out from underneath. I stamped a verse on the front, and added a little Soft Suede spatter using my aqua painter. All in all this was a quick card to put together.

I hope you'll come by tomorrow. I have been working on a simple tutorial to share how I made that stationary box I posted during last weekend's blog hop, here.

Friday, May 10, 2013

Stampin' Addicts Retiring Set Blog Hop


Hi Stampers! Welcome to the Stampin' Addicts Retiring Set Blog Hop! I am so excited to be part of this hop, and if you've been following along on the hop you have just arrived from Paula's Blog: Paula Stamps where Paula shared some projects using the Just Believe Stamp Set, one of my favorites and a keeper on my shelf for sure! Didn't Paula create some amazing things with that set?

Another keeper on my shelf is Kindness Matters. This week I used it to make a few gifts to celebrate Teacher Appreciation Week. And rather than keeping you reading much further, here is a Thank You card that got some great comments from a friend I showed it to last night:


As an Early Childhood Educator I go through Thank You cards like there's no tomorrow, and this stamp set has served me well over the past years, so I made one to share with you! One of my ever favorite color combinations is Pink Pirouette and Early Espresso. I paired them up for you here, along with Mambo Melon and some First Edition Specialty paper, also retiring this spring. I stocked up on this stuff already, and I recommend that you do too! I was really sad to see this listed on our retirement list. The little banners are made from some scraps of card stock I had in my stash, and the pink one was even sprayed with the soon to be retired Silver Foil Smooch Spritz. The flower was made using four layers of First Edition punched with my Scallop Circle Punch, and held together with a silver brad.

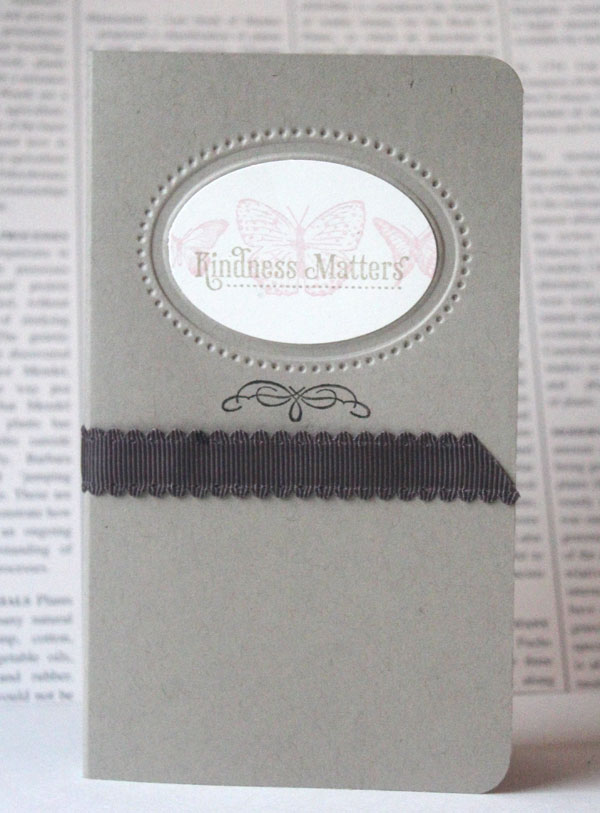
My next project is a little notebook I created using a 3 x 5 notepad found at a discount store:


These notepads are so easy to cover, and the custom cover only takes 1/2 a sheet of cardstock. How cool is that? For this notebook cover I used a base of Crumb Cake. Once it was scored in all the right places (and I'll post the measurements later next week!) I rounded the edges and ran it through the Big Shot using my Oval Shaped Designer Frame Folder. I stamped the butterflies onto Very Vanilla using Pink Pirouette, and Kindness Matters in Soft Suede. I was able to line it up just right with the help of my Stamp-a-Majig. I punched the image out with the Extra Large Oval Punch - it's the perfect fit - and put it in the center of the frame using some Stampin' Dimensionals. I finished off the front of my card with a bit of Chocolate Chip Scallop Dots Ribbon, and added the notepad to the inside with a bit of Mono Adhesive to hold it in place.

The last project I'm sharing with you today is a Stationary Box. I love making these little things, as they are done with just one sheet of 8 1/2 x 11 cards stock, scored and snipped in all the right places!


The original credit goes to a stamper named Val, and later this week I'll try to find the link to her blog where she shared it years ago! I created this box using Lucky Limeade, and let me tell you this has been one of my very favorite colors these past two years and I'm sorry to see it go!


I stamped the main image with a stamp from my French Foliage stamp set as a background in Sahara Sand onto Whisper White, and the centered the butterfly image over that in Lucky Limeade. I finished it off using a few blossoms from the 5/8" Flower Trim. I don't think I saw this stuff in the new catalog, so if you love it as much as I do don't wait to stock up. You still have a few weeks left!


I filled the inside of my box with a few notecards, inspired by Stampin' Up! Demonstrator Becky Roberts. They are topped off with a little strip of DSP from my Sunshine and Sprinkles pack, also in the Spring Catalog, and a few teeny white flowers I punched using my Itty Bitty Bits Punch Pack. I stamped the butterfly image in Lucky Limeade onto the bottom center of each note card only after I pre-stamped it onto a bit of scrap paper so the image could be light enough to be written over, if necessary. This little gift box is going to look adorable on the desk top of a teacher I know.

Well that's it for my projects this weekend. I hope you enjoyed looking at them as much as I enjoyed putting them together for you. Your next stop on our blog hop is Carmen's Stamping Addiction. Where she's featuring Little Friends. If you happen to get lost somewhere along the way, you can come back here to start over! Thanks for stopping by and have a great weekend!

Monday, May 6, 2013

Spring Flowers


About a week back I spent the morning playing with my Fabulous Florets set and practicing some water color techniques. For this card I began by stamping the flower stem twice on my base in Wild Wasabi to make it stretch the length of my card. Next I stamped the flowers in Stayz-On Black and embossed with clear embossing powder. I used Aqua Painters to fill in the centers with Daffodil Delight picked up from the lid of my ink pad. Then I used Mambo Melon to paint the flowers - I was experimenting so I left a bit of white visible. It's good to start lighter and add more color to go darker in the areas you want shaded. I added a bit of Dazzling Details to the flower centers (I always forget I have this stuff) for a little sparkle and popped them onto the card using Stampin' Dimensionals. I used my Aqua Painter and Melon Re-inker to add a splash of color and finished the card with a few Basic Jewels. I think the next time I would add the splash before the colors, but I am pretty happy with how it turned out.

Come back later this week as I share some ideas using a soon to be retired stamp set for this upcoming blog hop!


Thanks for stopping by!

Thursday, May 2, 2013

May's Stamp A Stack Technique: Omitting


For my Stamp A Stack club in May, we'll be using a technique to omit part of a stamped image. Here I omitted half of the verse on this stamp from the Feel Goods Stamp Set. The rest of the verse is inside of the card:


For this card I used the Fabulous Florets as an accent, along with some DSP from my Poetry Print DSP Pack, Apothecary Framelits, and Summer Starfruit as a base. I'll be running this Stamp A Stack twice next week, on Thursday, May 9th and Sunday, May 12th. Email me to reserve your space!